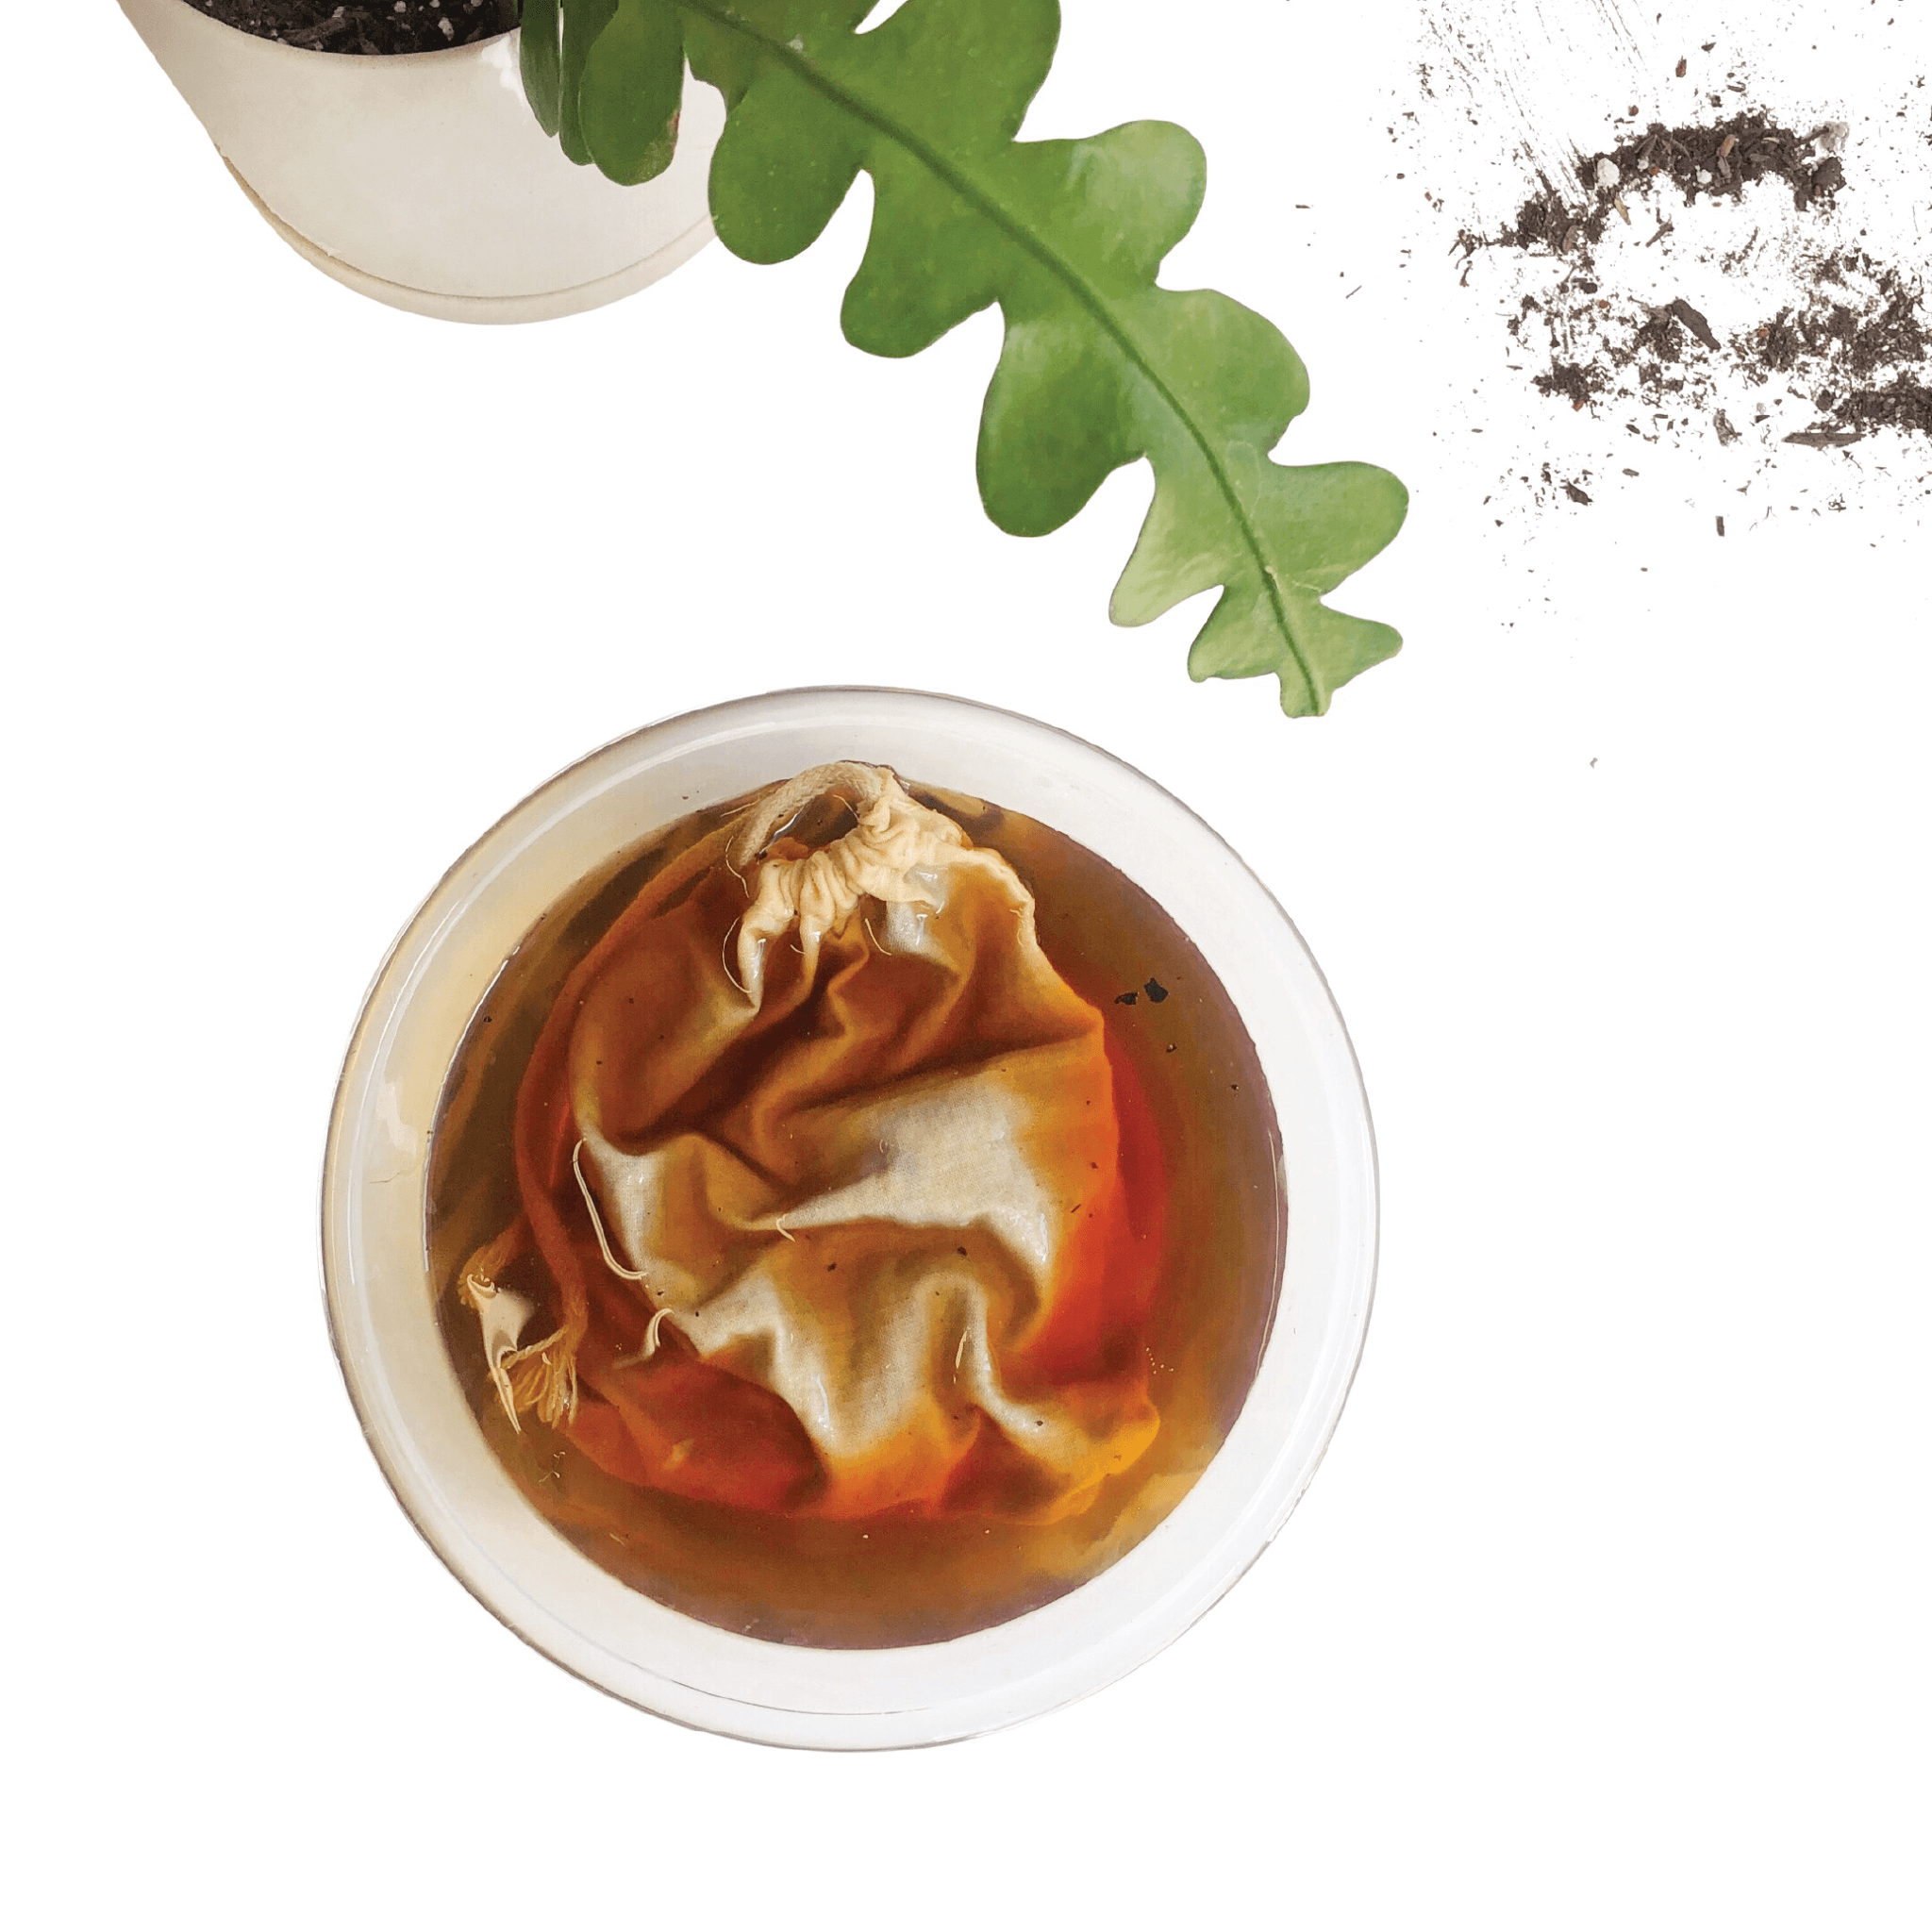
MAKE COMPOST TEA
HOW TO MAKE + USE COMPOST TEA Step by step guide on creating a small batch of steeped Compost Tea for your plants. Time Prep Time: 5 min Brew Time: 30 min - 24 hrs Materials ORGANIC COMPOST (1 CUP)...
Rest assured! We only send emails once every 1-2 months with product releases, sales or shop updates.
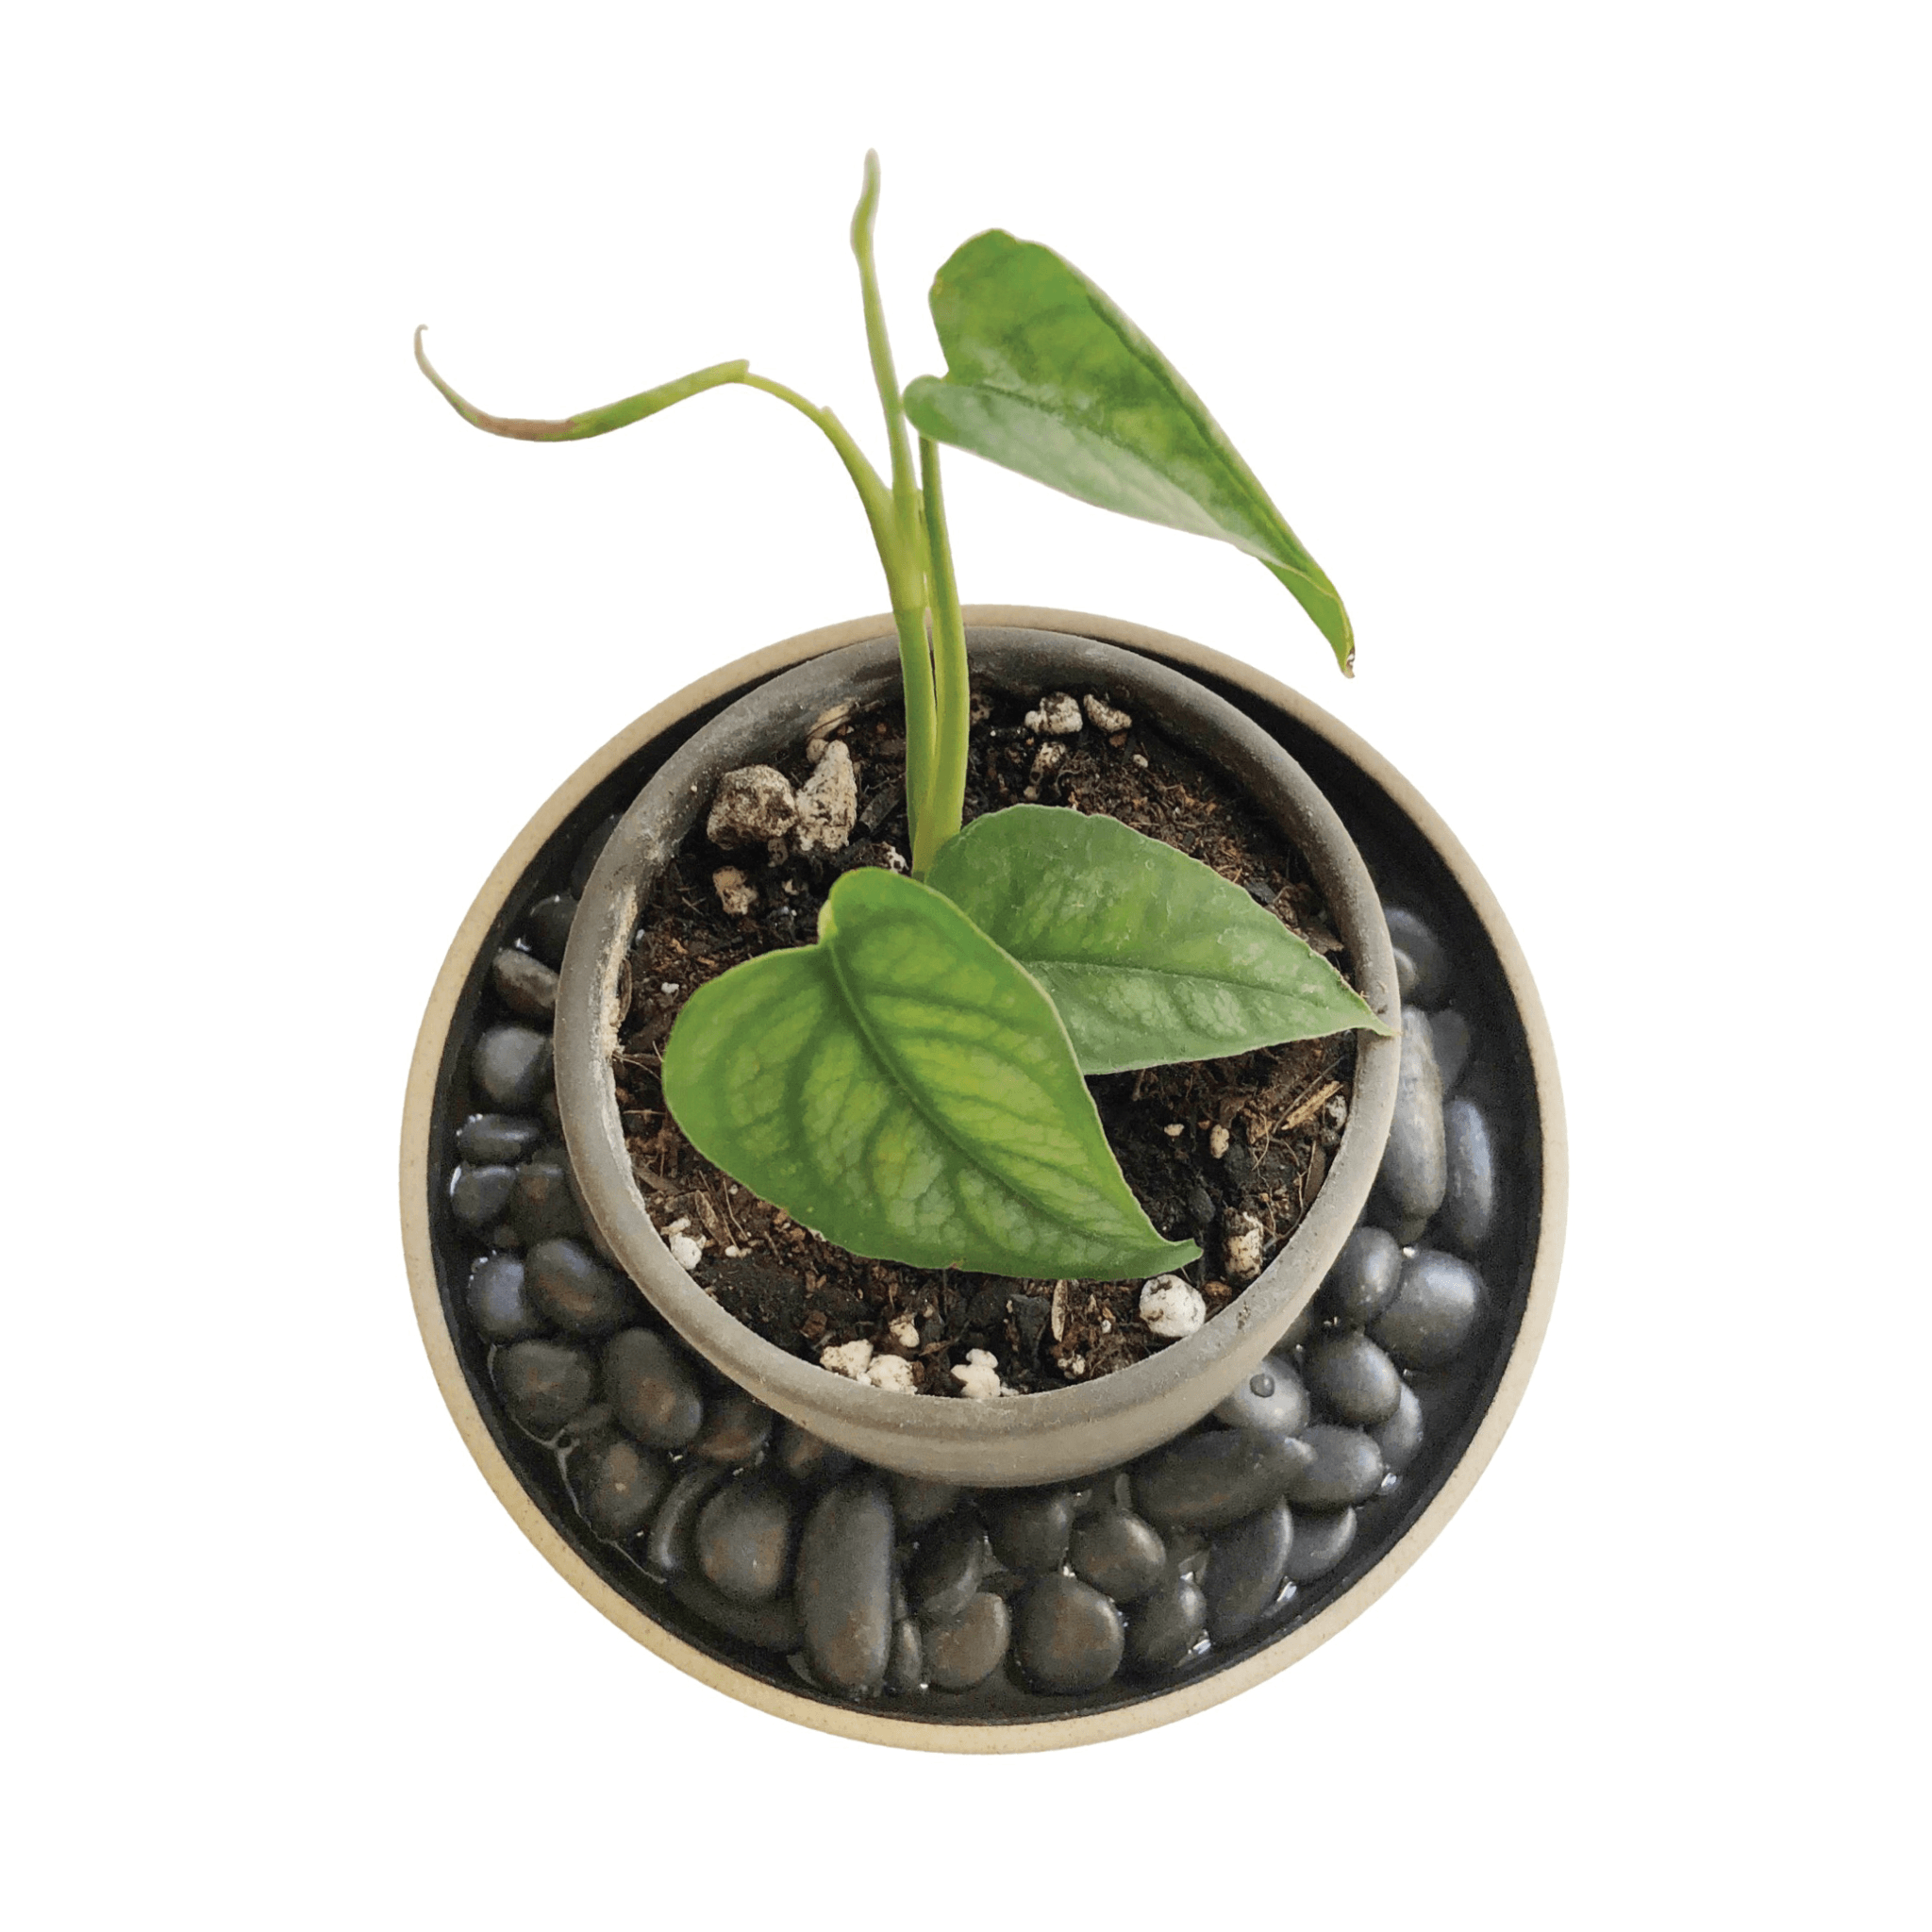
Step by step guide on creating a humidity tray for your houseplants.

Prep Time: 5 min

Whether you live in a dry environment, or dealing with seasonal dry weather - your houseplants prefer to have humidity year round.
If you do not have a humidifier or would like to add an additional humid micro-climate for your plants - you can easily create your own humidity tray following these simple steps:
1. Select your HUMIDITY LOVING PLANT OF CHOICE and check the Pot size. We are using a Monstera Siltepecana in a 3" PLANT POT.

2. Select your TRAY - tray size should be at least 2" wider in diameter than your selected Plant Pot. We are using our 5 5/8" PORCELAIN TRAY.

PLEASE do not use a TERRACOTTA TRAY as it will absorb the water and leak. It is best to use a non-porous tray material such as Metal or a Glazed Ceramic/Porcelain.
NOTE: You can also use a much larger sized TRAY and group multiple smaller plants on the tray if you'd like.

3. Select your ROCKS / PEBBLES / GRAVEL - we are using our 1cm PEBBLES.

NOTE: I prefer to use larger PEBBLES or ROCKS instead of gravel as you need less to fill the trays.
4. Rinse your PEBBLES thoroughly in a STRAINER to remove any silt from them and until water runs clean.

5. Add your clean PEBBLES in a thin layer covering the bottom of your TRAY - spread out evenly.

6. Add your WATER to your PEBBLES + TRAY. Only add a small amount to cover the bottom of your rocks. Water level should stop before the top of your Rocks. This is to prevent your plant from soaking up the water from the drainage hole and being over watered.

NOTE: IF your plant it really dry, you could add additional water to above the top of the rocks so that you can bottom water your plant if desired.

FURTHER STEPS
1. Now that your Humidity Tray is complete - keep an eye on the water levels. You may need to check every other day or just 1-2 times per week pending how dry and warm your room is. If your environment is more dry, the water will evaporate more quickly and you will need to periodically add more water to your tray.
2. We recommend cleaning the tray and rocks with soap and water periodically, as well as replacing with fresh water to prevent mold, etc from building up.
DISCLAIMER: I have tested these humidity trays using my own hygrometer, I am not a scientist. Using a humidity tray is recommended for slightly increasing humidity levels or increasing humidity in a small area. If you drastically need to increase humidity in your room or home, I do recommend trying a humidifier.
Step by step video guide is also available on our YouTube
1 comment

Before I place my pot on the rocks, does my pot have to have holes at the bottom? My plant is little Fiddle leaf
———
RT1home replied:
Hi Resha – The plant pot does not need a drainage hole as the humidityis created in the tray with rocks outside of the pot. But it is better in general for your plants to use pots with drainage holes. Also, a bonus of using a pot with a drainage hole is that it allows you to bottom water with your humidity tray. When you water the plant – the water drains out the bottom which also refills your humidity tray water at the same time :) Hope that helps!